The need
Proper documentation is critical for the success of any API. Without clear, interactive documentation, developers may find it frustrating to use your API. To solve this, we’ll document an ASP.NET Web API using Swagger.
What is Swagger?
Swagger is a powerful framework for describing, consuming, and visualizing RESTful APIs. It ensures that your API’s documentation, client, and server code stay in sync. This means that any methods, parameters, or models in your code are seamlessly reflected in the documentation.
For ASP.NET Web API, a popular implementation of Swagger is Swashbuckle. It’s lightweight, doesn’t require additional dependencies like ASP.NET MVC, and comes with an embedded Swagger-UI 🙂 for an interactive API playground.
Adding Swagger to an ASP.NET Web API Project
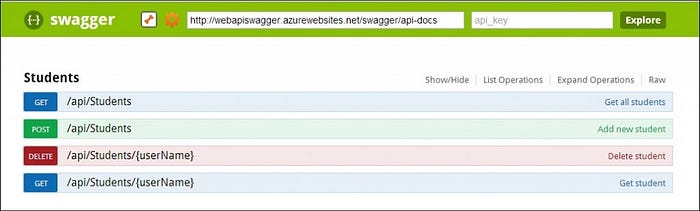
Let’s walk through how to integrate Swagger using Swashbuckle for a simple API project with one controller.
Step 1: Install Swashbuckle
Open the NuGet Package Manager Console and run:
Install-Package Swashbuckle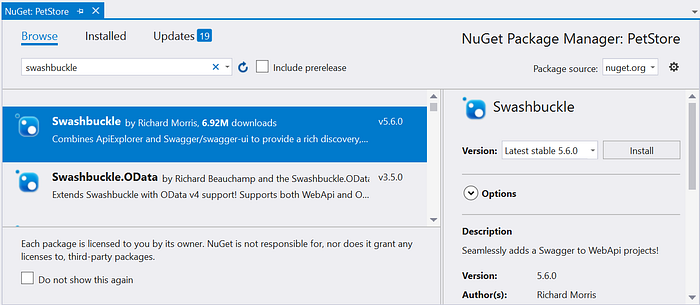
alternatively use the visual studio nuget manager to install swashbuckle.
Step 2: Configure Swagger in the Startup Class
In your Startup class, initialize Swashbuckle. Update the code like this:
 [assembly: OwinStartup(typeof(WebApiSwagger.Startup))]
namespace WebApiSwagger
{
    public class Startup
    {
        public void Configuration(IAppBuilder app)
        {
            HttpConfiguration config = new HttpConfiguration();

            WebApiConfig.Register(config);

            Swashbuckle.Bootstrapper.Init(config);

            app.UseWebApi(config);
        }
    }
}
Step 3: Enable XML Documentation
XML comments help provide detailed explanations for your API endpoints. To enable XML documentation:
- Right-click your project in Solution Explorer → Select Properties.
- Go to the Build tab.
- Scroll down to the Output section, check the XML documentation file box, and set the path to
bin[YourProjectName].XML.
This generates an XML file containing comments for your API methods and models.
Step 4: Configure Swagger to Use XML Comments
Modify the SwaggerConfig.cs file to include XML comments in the Swagger documentation. Add this code:
public class SwaggerConfig
{
public static void Register()
{
Swashbuckle.Bootstrapper.Init(GlobalConfiguration.Configuration);
SwaggerSpecConfig.Customize(c =>
{
c.IncludeXmlComments(GetXmlCommentsPath());
});
}
protected static string GetXmlCommentsPath()
{
return System.String.Format(@"{0}binWebApiSwagger.XML", System.AppDomain.CurrentDomain.BaseDirectory);
}
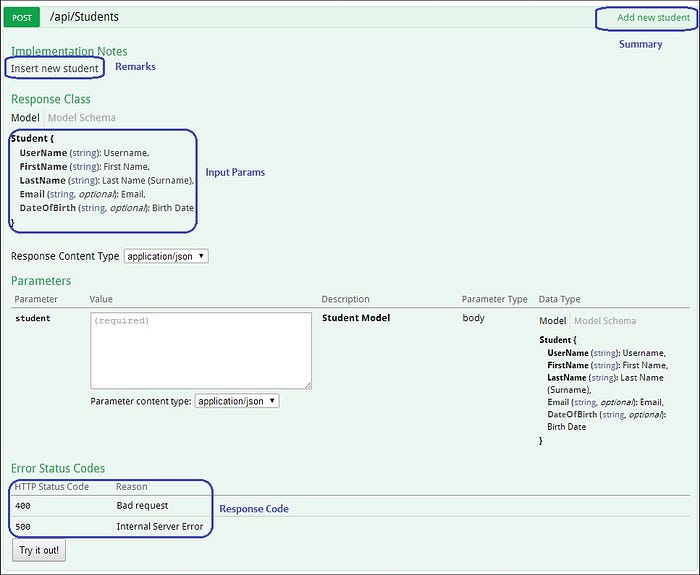
}Step 5: Add Annotations to API Methods and Models
Use XML comments to describe your methods, parameters, and responses. Here’s an example for a POST method in the StudentsController:
 ///
/// Add a new student
///
///Student Model /// Insert a new student into the system /// Bad request /// Internal server error [Route("")] [ResponseType(typeof(Student))] public IHttpActionResult Post(Student student) { // Implementation goes here... }Swagger will automatically include these comments in the interactive documentation.
Summary
By following these steps, you can seamlessly integrate Swagger into any ASP.NET Web API project. Swashbuckle makes it simple to generate interactive documentation that keeps your API, client, and server in sync.
Proper documentation makes your API more developer-friendly and increases its chances of success.