
Web development
What are WooCommerce shipping classes and how to use them
WooCommerce Shipping Classes are a great way for you to charge different shipping rates depending on the products purchased. shipping classes are a very useful feature which allows you to allocate shipping conditions to specific products. Here are step-by-step instructions on how to set up…
 Abhilash Sivaraman
WooCommerce Shipping Classes are a great way for you to charge different shipping rates depending on the products purchased. shipping classes are a very useful feature which allows you to allocate shipping conditions to specific products.
Here are step-by-step instructions on how to set up WooCommerce Shipping Classes.
Step 1:Add Shipping Classes
1./ Go to: WooCommerce > Settings > Shipping > Shipping Classes.
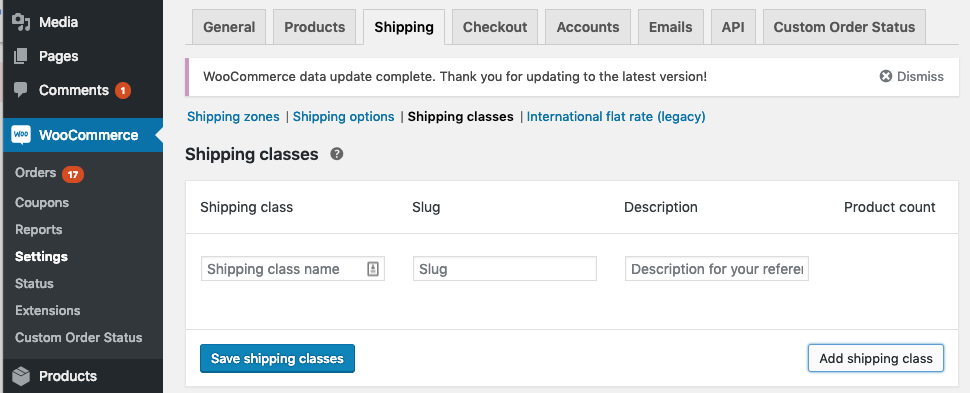
- click Add Shipping Class, and add the relevant details for the item you’d like to create a class for. Click Add Shipping Class again to add additional Classes, as necessary.
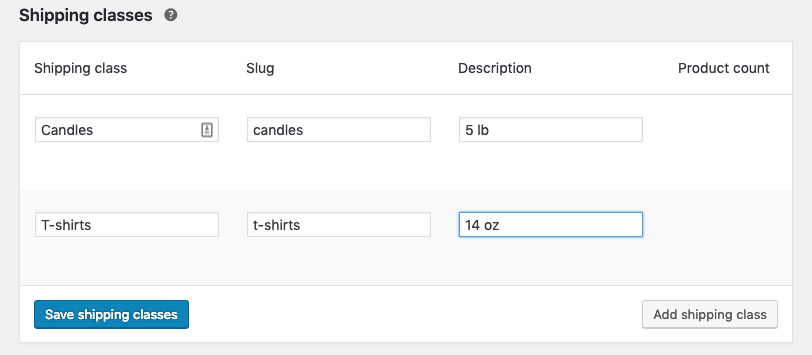
Step 2: Assign Your Products to the Appropriate Shipping Class
It’s time to assign your products to the appropriate Shipping Class. Once your products have been assigned a Shipping Class, then they will trigger the appropriate shipping price when they’re added to your shopping cart.
- In your WordPress dashboard, go to Products
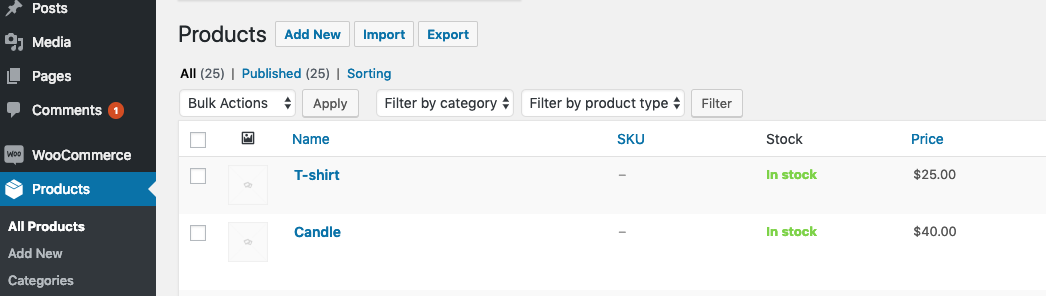
- Now click one of your products > Shipping > Shipping Class
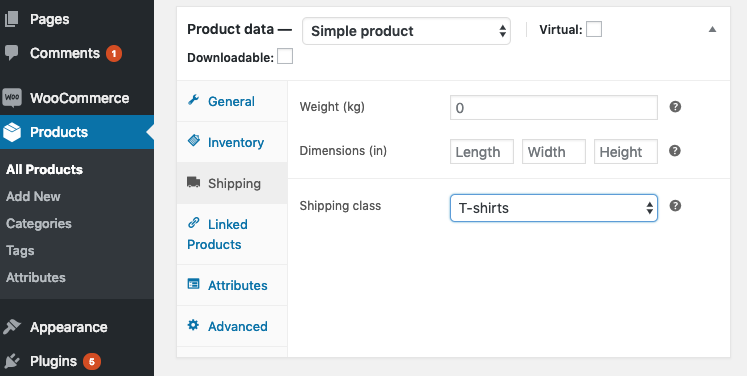
Step 3:Add shipping classes in bulk
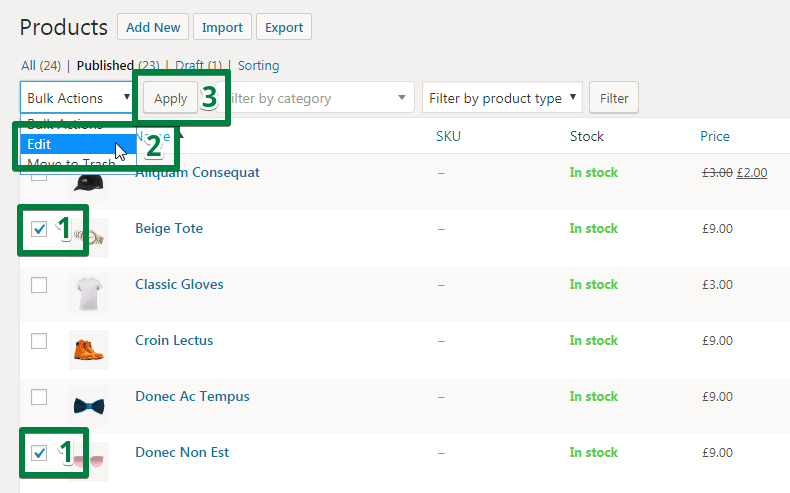
To assign more than one product to a shipping class, Simply select the** products > select an Edit option> Apply the operation**
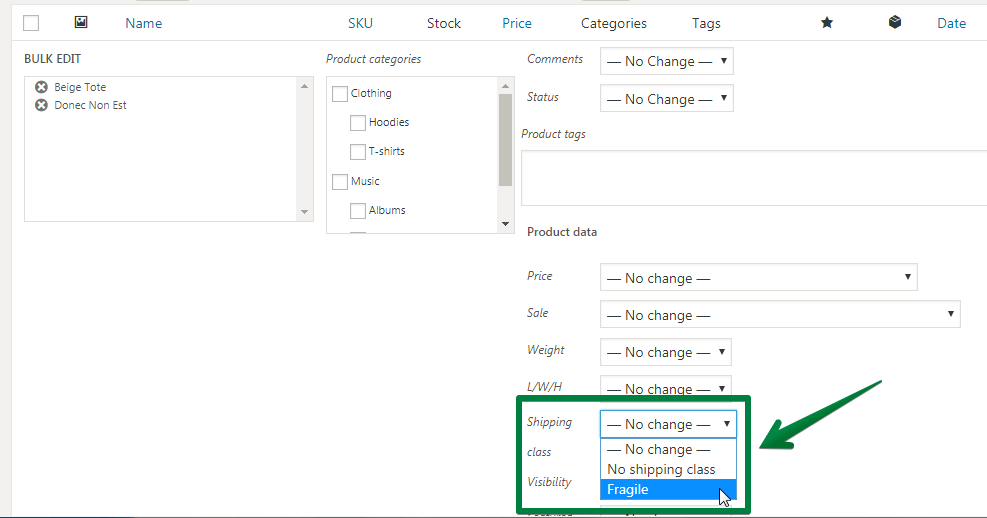
The new box will pop up. You have to select the shipping class you want your products to be assigned to.
Step 3: How to set shipping costs based on WooCommerce shipping classes?
You wanted to configure WooCommerce shipping classes in your store for the purpose. You want the shipping cost to depend on the shipping classes of products in the customer’s cart. Let check it out
Flat rate
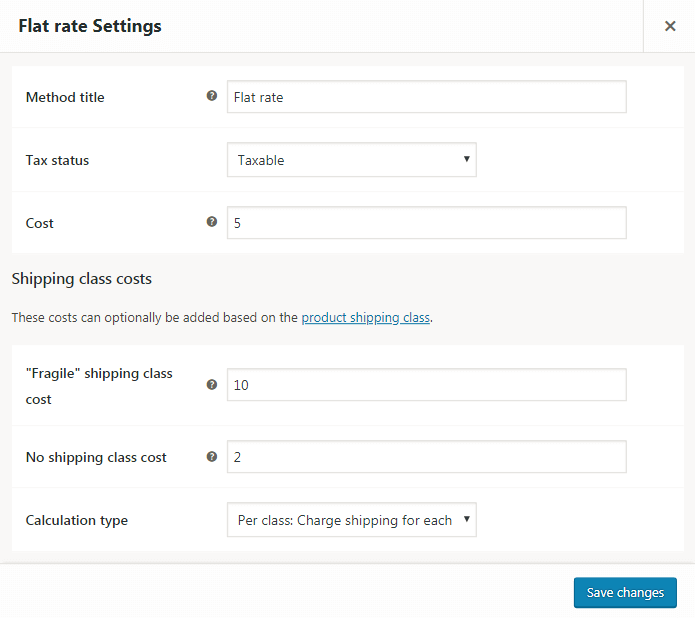
A new section shows up on the Flat rate settings screen. It is called Shipping class costs and you can see this section on the screenshot below:
Step 4: Add Your Shipping Information to WooCommerce
- Go to WooCommerce > Settings > Shipping > Shipping Zones.
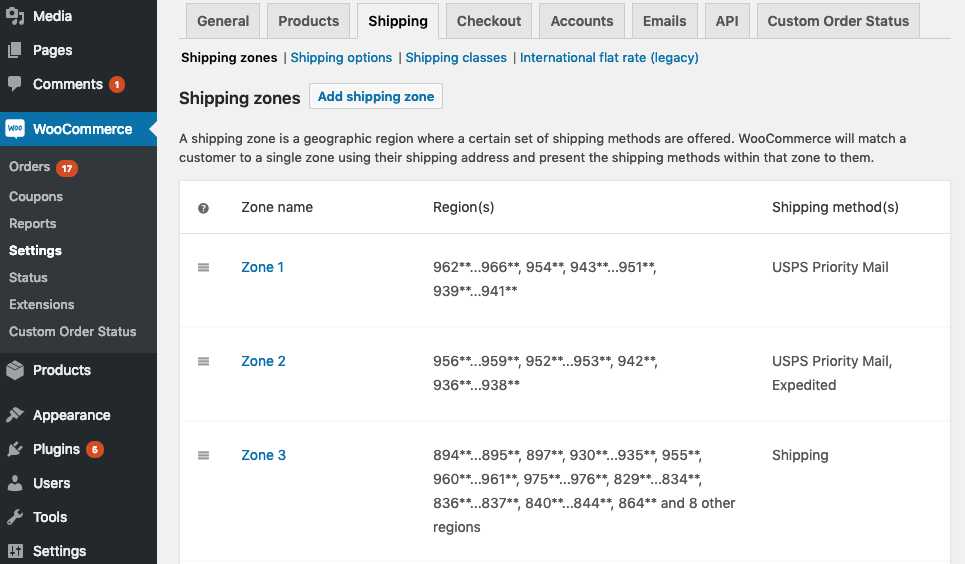
- Click the blue hyperlinked Zone Name
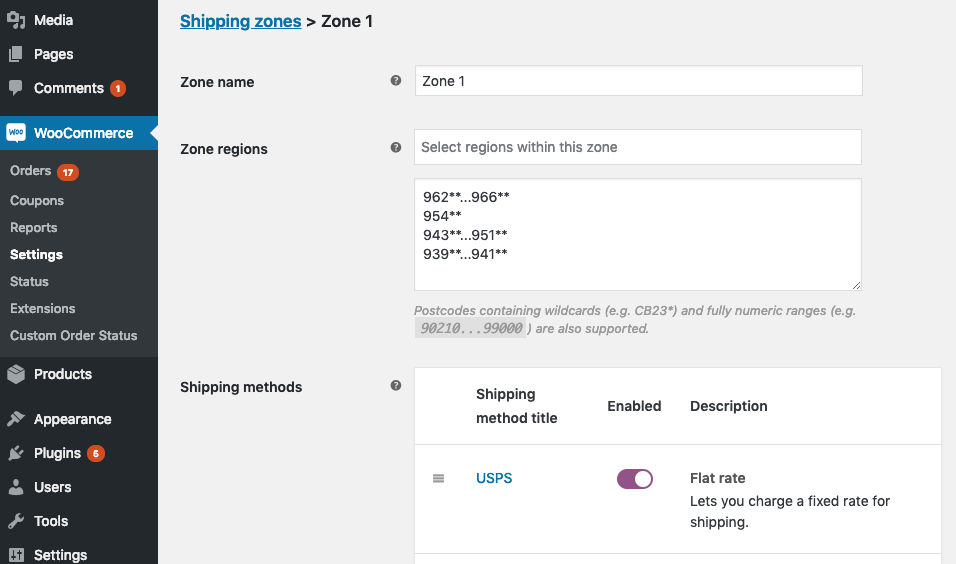
Congrats! Once you complete these steps, your WooCommerce Shipping Classes will be set up and you’ll be ready to ship orders to your customers. Test it for yourself by creating a few new orders and selecting unique ZIP codes.
Have a question or need some assistance? get in touch with us intertoons.com/